Stepping away from your camera’s “Auto” mode is the single most important decision for any aspiring photographer or videographer. It is the gateway to full creative control, allowing you to intentionally craft images that match your artistic vision. At the heart of this control lie a few core technical principles that govern how your camera captures light and motion. This guide is dedicated to demystifying two of the most critical concepts: the Exposure Triangle for still photography and Video Frame Rate (FPS) for moving images. By mastering how Aperture, Shutter Speed, ISO, and Frame Rate interact, you will be empowered to produce professional, compelling visuals in any lighting condition or for any creative scenario.
We will delve deep into each component, exploring not only its technical function but also its profound impact on the final look and feel of your work. From achieving a beautifully blurred background in a portrait to capturing crystal-clear slow-motion video, the knowledge within this guide will become the foundation of your creative toolkit.
The Exposure Triangle: Your Foundation for Perfect Photos
The concept of exposure is fundamental to all photography. It simply refers to the total amount of light that reaches the camera’s sensor, which determines how bright or dark your final image is. The Exposure Triangle is a model used to describe the three core camera settings that control this light: Aperture, Shutter Speed, and ISO. Each element functions as one side of the triangle, and a change in one requires an adjustment to one or both of the others to maintain the same level of exposure. Mastering this balancing act is the key to consistent and technically sound photography.
Demystifying Aperture (f-stop)
Aperture refers to the opening in your lens through which light passes to reach the camera sensor. Think of it as the pupil of your camera’s eye. It can be made wider to let in more light or narrower to let in less. Aperture is measured in “f-stops” (e.g., f/1.8, f/4, f/11).
- Wide Aperture (Small f-number, e.g., f/1.8): A smaller f-number signifies a wider opening, allowing a large amount of light to enter. This is ideal for low-light situations. Creatively, a wide aperture produces a shallow depth of field (DoF), which means only a small plane of the image is in sharp focus, while the foreground and background are beautifully blurred. This effect, known as bokeh, is highly sought after for portraits as it isolates the subject.
- Narrow Aperture (Large f-number, e.g., f/16): A larger f-number signifies a smaller opening, restricting the amount of light. This is used in bright conditions or when a deep depth of field is desired. A narrow aperture keeps a much larger portion of the scene in sharp focus, from the elements in the immediate foreground to the distant background. This is essential for landscape photography where you want the entire scene to be crisp and detailed.
Understanding Shutter Speed
Shutter speed dictates the length of time the camera’s sensor is exposed to light. It is measured in seconds or, more commonly, fractions of a second (e.g., 1/50s, 1/1000s). This setting not only controls brightness but is also the primary tool for controlling motion in your photographs.
- Fast Shutter Speed (e.g., 1/1000s or faster): A fast shutter speed freezes motion. The sensor is exposed to light for only an instant, capturing fast-moving subjects with crisp clarity. This is crucial for sports photography, wildlife, or capturing any action without blur. The trade-off is that it lets in very little light, requiring a wider aperture or higher ISO in compensation.
- Slow Shutter Speed (e.g., 1/30s or slower): A slow shutter speed allows motion to blur. By keeping the sensor exposed for a longer duration, any movement within the frame will be rendered as a streak or blur. This is a powerful creative tool for smoothing out waterfalls, capturing light trails from cars at night, or conveying a sense of speed. Using a slow shutter speed typically requires a tripod to keep the camera steady and prevent unintentional camera shake from blurring the entire image.
The Role of ISO
ISO measures the sensitivity of your camera’s sensor to light. In the days of film, you would buy film with a specific ISO rating. In digital photography, this can be changed for every shot. A lower ISO number (e.g., 100, 200) means the sensor is less sensitive, while a higher ISO number (e.g., 1600, 3200) makes it more sensitive.
- Low ISO (e.g., 100): This is the base sensitivity of your sensor and produces the highest quality image with the least amount of digital “noise” or grain. You should always aim to use the lowest ISO possible for the given lighting conditions.
- High ISO (e.g., 3200): Increasing the ISO is like artificially brightening the image after it’s been captured. It’s an essential tool for shooting in dark environments without a flash or when you need to use a fast shutter speed in low light. The significant trade-off is the introduction of digital noise, which appears as a grainy texture and can reduce image detail and color accuracy. Modern cameras are increasingly better at handling high ISOs, but the principle remains the same.

Video Frame Rate (FPS): The Key to Cinematic Motion
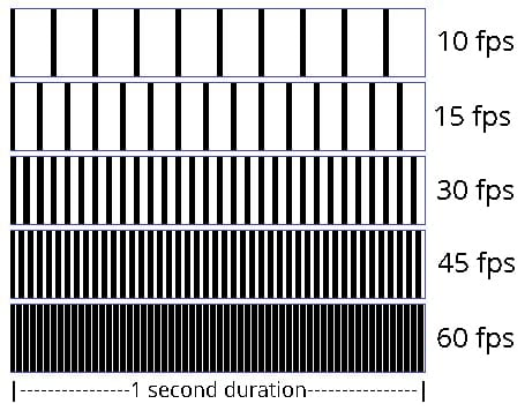
While the exposure triangle governs how a single image is captured, video introduces the dimension of time. A video is not a continuous recording of motion; rather, it’s a sequence of still images, called frames, displayed rapidly to create the illusion of movement. Frame Rate, measured in frames per second (FPS), defines how many of these individual frames are captured and displayed every second. The chosen frame rate has a dramatic impact on how motion is perceived by the viewer, defining the aesthetic feel of your video.
Common Frame Rates and Their Cinematic Uses
Different frame rates have become standards for different types of productions, each with a distinct look and purpose. Understanding these conventions is the first step in making intentional creative choices for your video projects.
- 24 FPS (The Cinematic Standard): This is the frame rate that has been used in filmmaking for nearly a century. It is the standard for movies and narrative television because it produces a subtle, natural-looking motion blur that is very similar to how our own eyes perceive the world. This slight blur gives footage a “dreamy” or “cinematic” quality that audiences are conditioned to associate with high-quality storytelling.
- 30 FPS (Broadcast & Live TV): This frame rate captures more frames per second, resulting in a slightly crisper and smoother look compared to 24 FPS. It is the standard for broadcast television, including news programs, soap operas, and live sporting events. The added clarity provides a sense of immediacy and realism, often described as a “video” look rather than a “film” look.
- 60 FPS (Smooth Motion & Slow Motion): Shooting at 60 FPS captures twice as many frames as 30 FPS, resulting in exceptionally smooth motion. This is ideal for content with very fast action, such as video game recordings or high-octane sports, where clarity is paramount. Crucially, footage shot at 60 FPS can be slowed down by 50% on a 30 FPS timeline (or 40% on a 24 FPS timeline) to create clean, smooth slow-motion without any choppiness.
- 120+ FPS (High-Speed & Super Slow Motion): Frame rates of 120 FPS, 240 FPS, or even higher are used specifically for capturing dramatic, super slow-motion effects. By capturing an immense amount of visual information every second, you can slow the footage down significantly to reveal details invisible to the naked eye, such as a water balloon popping or an athlete’s precise movements.

The Critical Link: Shutter Speed and Frame Rate
The principles of the exposure triangle do not disappear when shooting video. Aperture and ISO function in much the same way. However, shutter speed takes on a new, critical relationship with your chosen frame rate. This relationship is governed by a guideline known as the 180-Degree Shutter Rule, which is essential for achieving natural-looking motion in your videos.
Introducing the 180-Degree Shutter Rule
The 180-Degree Shutter Rule is a convention that originated from the mechanics of old rotary shutter film cameras. To put it simply, the rule states that your shutter speed should be set to double your frame rate. This is often expressed as a fraction: 1 / (2 x FPS).
- If shooting at 24 FPS, your ideal shutter speed is 1/48s (most cameras use 1/50s as the closest equivalent).
- If shooting at 30 FPS, your ideal shutter speed is 1/60s.
- If shooting at 60 FPS, your ideal shutter speed is 1/120s (or 1/125s).
- If shooting at 120 FPS, your ideal shutter speed is 1/240s (or 1/250s).
Why the 180-Degree Rule Matters
Following this rule creates an amount of motion blur in each individual frame that feels natural and pleasing to the human eye. When the frames are played back in sequence, the motion appears smooth and cinematic, not jarring or overly sharp. Deviating from this rule is a creative choice that produces a distinct stylistic effect. A shutter speed that is too fast (e.g., 1/1000s at 24 FPS) will result in unnaturally crisp frames with no motion blur, creating a choppy, staccato effect. Conversely, a shutter speed that is too slow (e.g., 1/30s at 24 FPS) will create excessive, dreamy motion blur that can look smeared and unprofessional.

Practical Application: Choosing Settings for Your Project
Understanding the theory is one thing; applying it in the field is another. Let’s walk through some common photo and video scenarios to see how you would combine these settings to achieve a desired outcome. In video, you will typically set your frame rate and shutter speed first, then use aperture, ISO, and ND filters to manage exposure.
Scenario 1: The Cinematic Short Film
Your goal is to achieve a classic film look with a shallow depth of field to focus on your characters.
- Frame Rate: 24 FPS. This is the non-negotiable standard for a cinematic feel.
- Shutter Speed: 1/50s. This adheres to the 180-degree rule for natural motion blur.
- Aperture: As wide as possible (e.g., f/1.4 to f/2.8) to create a shallow depth of field and beautiful bokeh.
- ISO & ND Filters: Set ISO to its base (e.g., 100). Because your shutter is locked and your aperture is wide, you will likely need a Neutral Density (ND) filter on your lens for outdoor daytime shooting. An ND filter acts like sunglasses for your lens, reducing the amount of light without affecting color, allowing you to maintain these settings even in bright sun.
Scenario 2: Capturing a Fast-Paced Sporting Event
Your goal is to capture crisp action and have the option for smooth slow-motion replays.
- Frame Rate: 60 FPS or 120 FPS. This will allow for smooth playback and give you the flexibility to create slow-motion sequences in editing.
- Shutter Speed: 1/125s (for 60 FPS) or 1/250s (for 120 FPS). Sticking to the 180-degree rule is still a good starting point for natural-looking slow motion. For still photos of the same event, you’d use an even faster shutter (e.g., 1/1000s) to freeze the action completely.
- Aperture: This will depend on the light. You may need a wider aperture (e.g., f/4) to compensate for the fast shutter speed.
- ISO: Adjust as needed to achieve correct exposure. In a well-lit stadium, you can keep it low, but for indoor or evening events, you will likely need to increase it.
Scenario 3: The Crisp Landscape Photograph
Your goal is a still photograph where everything from the foreground flowers to the distant mountains is in sharp focus.
- ISO: 100 (or your camera’s base ISO). You want the highest possible image quality and detail.
- Aperture: f/8 to f/16. A narrow aperture is required to achieve a deep depth of field, ensuring maximum sharpness across the entire scene.
- Shutter Speed: Adjust as needed for proper exposure. Since your ISO is low and aperture is narrow, you may need a slower shutter speed. A tripod is essential in this scenario to prevent camera shake and ensure a perfectly sharp image.
Frequently Asked Questions (FAQ)
- Q1: What is more important for video quality, frame rate or resolution (e.g., 1080p vs 4K)?
- Both are important for different reasons. Resolution (like 4K) determines the level of detail and clarity in the image. Frame rate (FPS) determines how motion is rendered. For a cinematic look, choosing the right frame rate (24 FPS) and shutter speed is arguably more critical to the “feel” of the video than resolution. However, high resolution provides more flexibility in post-production for cropping and stabilization. A 4K video at 24 FPS will look more professional than a 1080p video at a mismatched 47 FPS, for example.
- Q2: Can I apply the exposure triangle principles to my smartphone camera?
- Yes, absolutely. Most modern smartphones have a “Pro” or “Manual” mode in their camera app that gives you direct control over Shutter Speed and ISO. While most smartphone lenses have a fixed aperture, you can still balance the other two settings to control exposure and motion effects, such as creating light trails with a slow shutter speed on a tripod.
- Q3: What is the “180-degree shutter rule” and is it mandatory?
- The 180-degree shutter rule is a guideline, not a strict law. It suggests setting your shutter speed to double your frame rate (e.g., 1/50s for 24 FPS) to achieve natural-looking motion blur. While it’s the standard for most narrative and commercial video, you can intentionally break it for creative effect. For example, filmmakers used a very fast shutter speed in the D-Day scene of “Saving Private Ryan” to create a jarring, chaotic, and hyper-realistic feel.
- Q4: How do I get that blurry background effect (bokeh) in my photos?
- The blurry background effect, or bokeh, is primarily controlled by aperture. To achieve it, you need to use a wide aperture (the smallest f-number your lens allows, like f/1.8). Additionally, the effect is enhanced when you are physically close to your subject and your subject is far away from the background. Using a lens with a longer focal length (e.g., 85mm) also helps create more significant background separation.
- Q5: When should I intentionally use a high ISO?
- You should use a high ISO when you have no other way to get a proper exposure. This typically occurs in low-light situations where you cannot use a flash or tripod. For example, if you are shooting a handheld photo of a person indoors and a wide aperture and the slowest possible handheld shutter speed (e.g., 1/60s) still result in a dark image, your only option is to raise the ISO to get the shot. It’s always a trade-off between getting a noisy photo versus getting no photo at all.