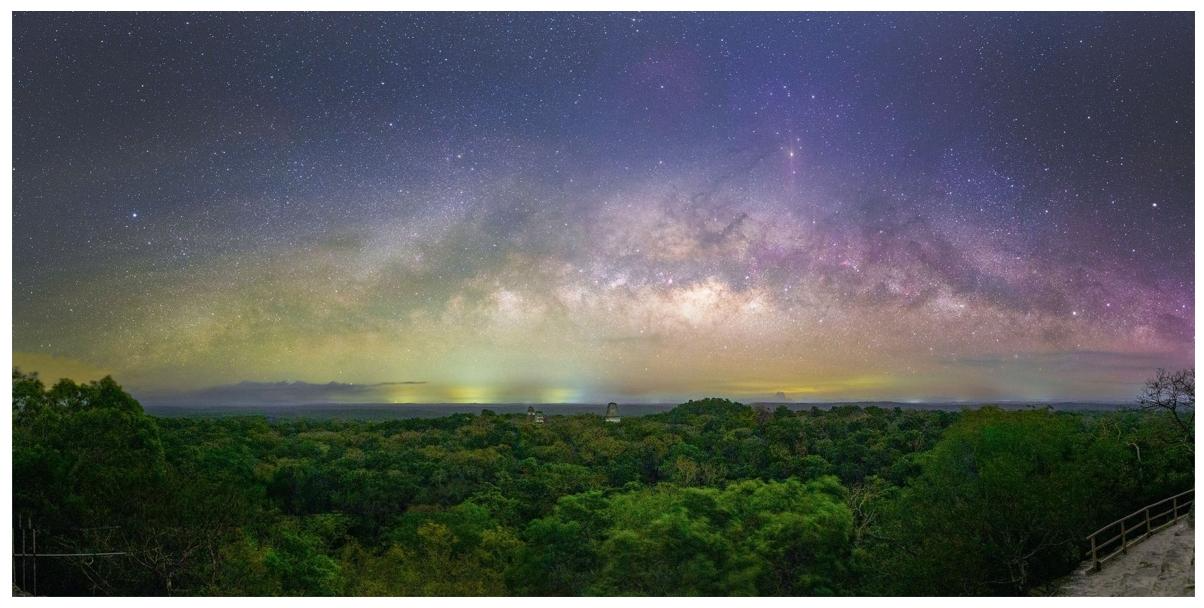
Capturing the profound beauty of the sky, from a dramatic sunset over a mountain range to the faint, ancient light of a distant galaxy, is a pursuit that blends art, science, and technology. This comprehensive guide serves as your roadmap to mastering the craft of imaging both our planet and the cosmos. We will explore the foundational concepts, the specialized equipment, the precise techniques for various celestial targets, and the digital artistry required to transform raw data into a stunning final image. This journey will cover everything from wide-field landscape astrophotography to deep-sky imaging, empowering you to reveal the secrets hidden in the night sky.
Understanding the Fundamentals of Sky Imaging
Before diving into equipment and techniques, it’s crucial to grasp the core principles that govern astrophotography. Unlike daytime photography, where light is abundant, imaging the sky is a battle to collect as much faint light, or signal, as possible while minimizing unwanted noise. The quality of any astrophoto is determined by its signal-to-noise ratio (SNR). A high SNR results in a clean, detailed image, while a low SNR produces a grainy, indistinct picture.
The Nature of Celestial Light
The light from stars and nebulae has traveled for thousands, sometimes millions, of years to reach your camera sensor. It is incredibly faint and requires long exposure times to register. The Earth’s rotation becomes a significant factor during these long exposures; without compensation, stars will appear as streaks instead of sharp points. This is the primary reason specialized tracking mounts are essential for serious astrophotography.
The Atmospheric Barrier
The Earth’s atmosphere, while essential for life, is a major obstacle for astronomers and astrophotographers. It distorts, dims, and scatters starlight. This atmospheric turbulence, known as “seeing,” affects the sharpness and detail you can resolve. Furthermore, moisture and dust particles in the air can reflect artificial light, contributing to the pervasive issue of light pollution.
The Challenge of Light Pollution
Light pollution is the brightening of the night sky caused by streetlights and other man-made sources. This artificial glow washes out faint celestial objects, making it impossible to see or photograph them from urban and suburban areas. Successful sky imaging often requires traveling to “dark sky sites,” locations far from city lights, to capture the best possible data. Specialized filters can help mitigate some effects of light pollution, but they are no substitute for a truly dark sky.

Essential Equipment for Celestial and Terrestrial Sky Photography
The right equipment is fundamental to capturing high-quality images of the sky. While you can start with a basic DSLR and a tripod, advancing in this field involves acquiring more specialized gear. The choice of equipment depends heavily on your intended targets, whether they are wide Milky Way landscapes or distant galaxies.
Cameras: From DSLRs to Dedicated Astro Cams
The heart of any imaging setup is the camera. There are several types suitable for astrophotography, each with its own advantages.
- DSLR/Mirrorless Cameras: These are the most accessible entry point. Modern full-frame or APS-C sensors are highly sensitive and capable of capturing impressive detail. Their versatility allows them to be used for both normal photography and astrophotography. For best results, look for models with low sensor noise at high ISO settings and a “Live View” function for precise focusing.
- Dedicated Astronomy Cameras: For the most serious imagers, these cameras are optimized specifically for capturing faint light. They often feature thermoelectric cooling (TEC) to dramatically reduce thermal noise during long exposures. They come in both “One-Shot Color” (OSC) and monochrome versions. Monochrome cameras, when used with color filters, offer the highest sensitivity and control over the final image.
Lenses and Telescopes: Your Window to the Cosmos
The optic you choose determines your field of view and light-gathering power.
- Wide-Angle Lenses: Lenses with focal lengths between 14mm and 35mm are ideal for landscape astrophotography, capturing sweeping vistas of the Milky Way, meteor showers, or aurorae. Look for lenses with a wide maximum aperture (e.g., f/1.8 or f/2.8) to gather more light in less time.
- Telephoto Lenses: Lenses in the 70-300mm range can frame larger deep-sky objects like the Andromeda Galaxy or the Orion Nebula, offering a bridge between wide-field and deep-sky imaging.
- Telescopes: For high-magnification views of planets, nebulae, and galaxies, a telescope is necessary. Refractors, reflectors, and Schmidt-Cassegrains are common types, each with specific strengths. The telescope’s aperture (the diameter of its main lens or mirror) is its most important specification, as it dictates light-gathering ability and potential resolution.
Mounts: The Unsung Hero of Astrophotography
A stable and accurate mount is arguably the most critical component for long-exposure astrophotography. A simple camera tripod is sufficient for very short exposures (under 30 seconds), but anything longer requires an equatorial mount. This type of mount is aligned with the Earth’s axis of rotation, allowing it to track celestial objects with a single motion, preventing star trails and enabling crisp, sharp images over many minutes.

Core Techniques for Capturing the Night Sky
With your gear ready, success depends on mastering a set of core techniques. These methods are designed to maximize the signal from your target while minimizing noise and other artifacts.
Mastering Exposure in the Dark
The standard exposure triangle (Aperture, Shutter Speed, ISO) is adapted for astrophotography. Your primary goal is to collect as much light as possible without blowing out highlights or trailing the stars.
- Aperture: Use the widest aperture your lens allows (the lowest f-number) to maximize light gathering.
- Shutter Speed: For untracked shots on a tripod, use the “500 Rule” (or the more accurate “NFP Rule”) as a starting point to determine the maximum shutter speed before stars begin to trail. With a tracking mount, you can take exposures lasting several minutes.
- ISO: You will need to use a high ISO (e.g., 1600-6400 on a DSLR) to make the sensor sensitive enough to record faint light. The optimal ISO is a balance between capturing signal and introducing unwanted sensor noise.
The Art of Focusing on Infinity
Achieving perfect focus is critical and can be challenging in complete darkness. Autofocus will not work. The most reliable method is to use your camera’s Live View screen. Point the camera at the brightest star or planet available, digitally zoom in as far as possible, and manually adjust the focus ring until the star appears as a tiny, sharp point of light.
Image Stacking and Calibration Frames
Instead of a single long exposure, advanced astrophotographers take many shorter exposures (called “lights” or “sub-exposures”) and “stack” them using software. This process statistically averages out random noise, dramatically improving the signal-to-noise ratio. To further improve the image, a series of calibration frames are also captured:
- Darks: Taken with the lens cap on, at the same exposure time and temperature as the lights, to record and subtract thermal noise.
- Flats: Taken of a uniformly illuminated surface to record vignetting and dust spots on the sensor, which can then be digitally removed.
- Biases: Very short exposures with the lens cap on to capture the camera’s inherent sensor readout noise.

Integrating Earth and Sky: Advanced Landscape Astrophotography
Combining a terrestrial foreground with the night sky creates a powerful sense of place and scale. However, it presents unique challenges, primarily the vast difference in brightness between the land and the stars. Several techniques can be used to achieve a balanced, realistic final image.
Planning Your Shot with Precision
Successful landscape astrophotography begins with meticulous planning. Use apps like PhotoPills or Stellarium to predict the position of the Milky Way, moon phases, and key constellations relative to your chosen location. Scouting the location during the day is essential to find compelling compositions and identify potential hazards.
Composition: Grounding the Cosmos
The principles of composition are just as important at night. Use leading lines, natural frames, and strong foreground elements like mountains, trees, or rock formations to add depth and context to the sky. The goal is to create a harmonious relationship between the earthly and the celestial elements within the frame.
Techniques for Balancing Exposure
Because the foreground is much darker than the ambient light from the sky, a single exposure often fails to capture detail in both. Advanced photographers use several methods to overcome this:
- Light Painting: During a long exposure, use a flashlight or headlamp to briefly “paint” light onto the foreground elements, selectively brightening them. This requires experimentation to get the balance right.
- Exposure Blending: Take two separate exposures: one long exposure optimized for the sky (with tracking if possible), and another, often even longer exposure (or one taken during blue hour), focused and optimized for the foreground. These two images are then carefully blended together in post-processing software like Photoshop.
- High-Dynamic Range (HDR): While less common, bracketing several exposures can sometimes be used to capture the full range of light, though this can be difficult to execute cleanly for night scenes.

Post-Processing: Bringing Your Images to Life
The data captured by your camera is only the raw material. Post-processing is where the faint details are revealed and the aesthetic vision is realized. This digital darkroom stage is a critical and skill-intensive part of the workflow, transforming a dark, low-contrast file into a vibrant and detailed image.
Stacking and Calibration
The first step for deep-sky or multi-exposure images is to use specialized software to stack the light frames and apply the calibration frames. Programs like DeepSkyStacker (for Windows), Sequator (for landscapes), or the more advanced PixInsight are used for this process. This produces a single master file with a very high signal-to-noise ratio, ready for editing.
Stretching the Histogram
The stacked image will still appear very dark because most of the data is clustered on the left side of the histogram. The core process of astrophoto editing is “stretching” this data. Using tools like Levels and Curves in Adobe Photoshop or PixInsight, you carefully and iteratively expand the histogram to brighten the mid-tones and reveal the faint nebulosity and galactic structures without clipping the black (space) or white (star cores) points.
Color Correction and Enhancement
Achieving natural and appealing color is a key goal. This involves setting the correct white balance, neutralizing color casts from light pollution, and enhancing the subtle colors of stars and emission nebulae (the reds of hydrogen-alpha) and reflection nebulae (the blues of scattered starlight). Saturation adjustments must be made carefully to avoid an artificial look.
Noise Reduction and Sharpening
Even after stacking, some noise will remain. Targeted noise reduction should be applied, often using masks to protect the high-detail areas of your subject. Following this, sharpening can be applied to enhance details, but it must be done with caution to avoid creating halos around stars or amplifying the remaining noise.

Overcoming Common Challenges in Sky Imaging
Every astrophotographer, regardless of experience level, faces a variety of challenges during an imaging session. Anticipating and knowing how to handle these issues is key to a productive night under the stars.
Dealing with Dew and Frost
As temperatures drop overnight, moisture can condense on your lens or telescope optics, completely ruining your images. This is a very common problem. The solution is to use a dew heater, which is a small, electrically powered strip that wraps around your lens or telescope tube, gently warming it just enough to keep it above the dew point. A lens hood can also help delay its formation.
Battling Wind and Vibrations
Even a slight breeze can vibrate your setup during a long exposure, resulting in blurred images. A sturdy, heavy tripod or pier is your first line of defense. Shielding your equipment from the wind using a car or a portable windbreak can also be effective. Avoid touching the camera during an exposure; use an intervalometer or remote shutter release to trigger the camera without introducing vibrations.
Troubleshooting Equipment in the Dark
Equipment can and will fail in the field. Batteries die, cables come loose, and software can crash. A methodical approach to troubleshooting is essential. Always bring spare batteries and cables. Use a red-light headlamp to preserve your night vision while working on your gear. Before heading out, practice setting up and tearing down your entire imaging rig at home so you are familiar with every connection and setting.
Frequently Asked Questions (FAQ)
- What is the best beginner camera for astrophotography?
- A great starting point is a relatively recent DSLR or mirrorless camera with a large sensor (APS-C or full-frame) and good high-ISO performance. Models like the Canon EOS Ra (specialized for astro), Sony A7 series, or Nikon Z series are excellent choices. The key is manual control, low noise, and the ability to use interchangeable lenses.
- How do I find a dark sky site near me?
- You can use light pollution maps, such as the Light Pollution Map or Dark Site Finder websites, to locate areas with minimal artificial skyglow. These maps use a color-coded scale (the Bortle Scale) to rate sky quality. Generally, you want to be in a blue, grey, or black zone for the best results, which often requires driving one to two hours away from major cities.
- What is the “500 Rule” and is it still accurate?
- The “500 Rule” is a simple guideline to estimate the longest shutter speed you can use before stars start to trail in a photo. You divide 500 by the focal length of your lens (e.g., 500 / 20mm = 25 seconds). However, with modern high-resolution sensors, this rule is often too generous. More accurate methods like the “NPF Rule” (which accounts for sensor size and aperture) are now recommended for getting perfectly sharp stars in untracked shots.
- Do I need a telescope to do astrophotography?
- No, you do not need a telescope to start. A camera, a wide-angle lens, and a tripod are all you need to capture stunning images of the Milky Way, constellations, and meteor showers. A telescope is only necessary when you want to capture high-magnification, detailed images of smaller, more distant objects like planets, galaxies, and nebulae.
- Why is post-processing so important in astrophotography?
- The raw data captured by your camera contains all the information about faint celestial objects, but it is “hidden” in a very low-contrast format. The unprocessed image often looks dark and unimpressive. Post-processing, specifically a process called “stretching,” is essential to carefully reveal this faint detail, enhance color, reduce noise, and correct for imperfections, transforming the raw data into the beautiful and detailed final image.