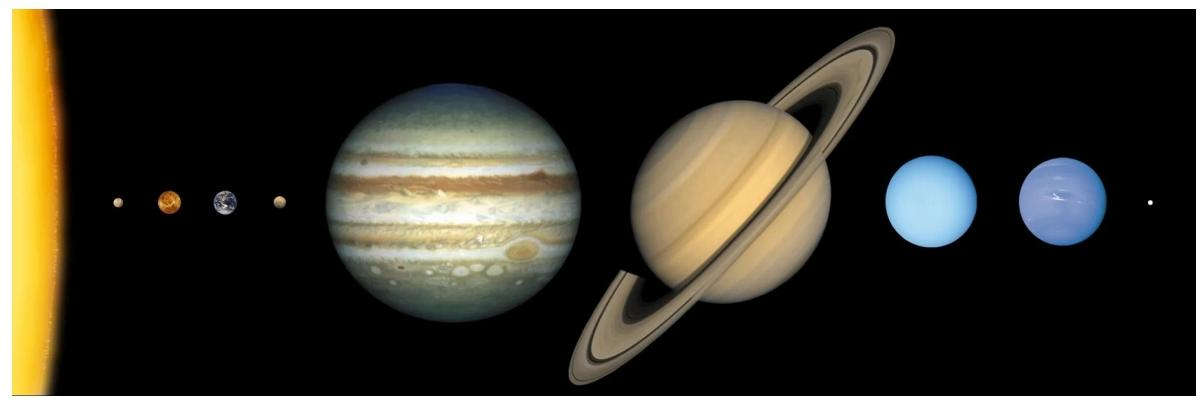
The pursuit of celestial wonders requires a blend of scientific understanding, patience, and technical proficiency. Whether you are peering through a modest 60mm refractor or operating a sophisticated cooled CMOS camera, the quality of your results depends heavily on atmospheric conditions, equipment calibration, and post-processing workflows. This guide synthesizes expert knowledge to help you transition from a casual observer to a master of planetary science and imagery.
Optimal Timing for Planetary Observation with Small Telescopes
Timing is the most critical variable in amateur astronomy. Even the highest-quality optics cannot overcome a turbulent atmosphere or a planet positioned too low on the horizon. To maximize the capabilities of a small telescope, observers must understand the orbital mechanics that bring planets into the best viewing positions.
Understanding Opposition and Elongation
For superior planets—those further from the Sun than Earth, such as Mars, Jupiter, and Saturn—the “Goldilocks” moment for observation is Opposition. This occurs when Earth passes directly between the Sun and the planet. During opposition, the planet is at its closest point to Earth, appearing larger and brighter in the eyepiece. Furthermore, it rises at sunset and remains visible all night long, reaching its highest point in the sky (culmination) around midnight.
For inferior planets like Venus and Mercury, the rule changes. Since they are closer to the Sun, they never reach opposition. Instead, look for Greatest Elongation. This is the point where the planet reaches its maximum angular distance from the Sun as seen from Earth. During eastern elongation, the planet is visible in the evening sky; during western elongation, it appears in the morning sky before dawn.
Atmospheric Seeing and Transparency
The term “Seeing” refers to the stability of the air. High-altitude turbulence causes stars to twinkle and planetary details to blur. On nights of “poor seeing,” high magnification will only reveal a boiling, distorted image. Conversely, “Transparency” refers to the clarity of the air—the absence of dust, moisture, and smoke. Interestingly, the best planetary seeing often occurs on nights with slight haze or fog, as the atmosphere is exceptionally still.
- Altitude Matters: Always wait for a planet to reach at least 30 degrees above the horizon to minimize the amount of Earth’s atmosphere the light must pass through.
- Thermal Equilibrium: Ensure your telescope has “cooled down” to the ambient outdoor temperature for at least 30–60 minutes to prevent internal heat currents from distorting the view.

Deep Dive into Observing Saturn: The Jewel of the Solar System
Saturn is often described as the most breathtaking object in the night sky. While its rings are visible in almost any telescope, seeing the fine details requires specific techniques and an understanding of the planet’s current orientation.
Navigating the Rings and the Cassini Division
The most famous feature of Saturn is the Cassini Division, a dark gap between the two largest rings (A and B). In a small telescope (4-inch aperture or larger), this appears as a thin, dark thread-like line. To see it, you need steady air and a magnification of at least 100x. The visibility of the rings also depends on Saturn’s axial tilt relative to Earth. Every 15 years, the rings appear “edge-on” and virtually disappear, while at other times, they tilt significantly, revealing the planet’s southern or northern poles.
Identifying Saturn’s Moons
Saturn possesses dozens of moons, but a few are easily accessible to amateur equipment. Titan, the largest, is visible in almost any telescope as a small “star” nearby. On exceptionally clear nights, larger apertures may reveal Rhea, Tethys, and Dione. Observing these moons over several nights allows you to track their orbital dance around the ringed giant, a truly rewarding experience for any stargazer.

Essential Techniques for Clear Planetary Photography
Capturing clear, high-resolution photos of planets is fundamentally different from traditional landscape or portrait photography. Because planets are small and bright, they are highly susceptible to atmospheric distortion.
The Lucky Imaging Method
The industry standard for planetary imaging is “Lucky Imaging.” Instead of taking a single long-exposure photo, astrophotographers record a high-frame-rate video (AVI or SER format). By capturing thousands of frames in a short window, you increase the statistical probability that some frames will coincide with moments of perfect atmospheric stability. Software is then used to analyze these frames, discard the blurry ones, and stack the sharpest “lucky” frames into a single high-quality image.
Post-Processing and Stacking Software
The transition from a raw video to a masterpiece involves several specialized tools. AutoStakkert! is the premier choice for alignment and stacking, while Registax is legendary for its “Wavelet” sharpening filters. Wavelets allow you to enhance specific scales of detail, bringing out cloud bands on Jupiter or the hexagonal storm on Saturn’s pole without introducing excessive noise.
| Software Tool | Primary Function | Best For |
|---|---|---|
| FireCapture | Image Acquisition | High-speed planetary video recording |
| AutoStakkert! | Stacking | Aligning and merging the best frames |
| Registax | Sharpening | Applying Wavelets to reveal fine details |
| WinJUPOS | De-rotation | Correcting for planetary rotation in long sessions |

Achieving Hubble-Like Results from Your Backyard
While we cannot put our telescopes in space, modern technology allows us to mimic the “Hubble look.” This involves using advanced filters and long-exposure techniques to capture deep-sky objects or planetary nebulae with extreme contrast and color depth.
Narrowband Imaging and Filter Selection
To achieve the iconic “Hubble Palette,” photographers use narrowband filters that only allow specific wavelengths of light to pass through—typically Hydrogen-alpha (Hα), Oxygen-III (OIII), and Sulfur-II (SII). By assigning these specific gases to the Red, Green, and Blue channels in post-processing, you can reveal intricate structures in nebulae that are invisible to the naked eye. This technique also has the added benefit of cutting through significant light pollution in urban areas.
Advanced Post-Processing Workflows
Creating a Hubble-like image requires more than just stacking. Techniques such as Deconvolution (a mathematical way to reverse blurring) and Star Reduction (making stars smaller to emphasize the nebula) are vital. Programs like PixInsight offer powerful scripts to manage these complex mathematical operations, allowing for a level of detail that was once the exclusive domain of professional observatories.

Capturing the Beauty of Comets: A Specialized Approach
Comets are the nomads of the solar system, and photographing them presents a unique challenge: they move at a different speed than the background stars. This relative motion means that if you track the stars, the comet will blur; if you track the comet, the stars will trail.
Tracking the Nucleus vs. Background Stars
To get a sharp image of a comet’s head (the coma and nucleus), you must use “Comet Tracking” features found in modern equatorial mounts or specialized software. This tells the telescope to move at the specific orbital rate of the comet. For the best of both worlds, many photographers take two sets of exposures—one for the stars and one for the comet—and then merge them in Photoshop to create a composite image where both elements are tack-sharp.
Long Exposure Challenges for Cometary Tails
A comet’s tail is often faint and requires long exposures to capture. However, because comets are often only visible during twilight (near the horizon), the window for imaging is small. Using a fast focal ratio (like an f/2 or f/4 system) is highly advantageous. Furthermore, the use of a Luminance filter can help capture the maximum amount of light from the dust tail, while an OIII filter can sometimes highlight the ion tail’s blue structure.
Frequently Asked Questions (FAQ)
- Q1: Can I see the rings of Saturn with a cheap beginner telescope?
- Yes, Saturn’s rings are visible even at 25x magnification. However, to see the Cassini Division or details on the planet’s surface, you generally need a telescope with at least a 70mm to 90mm aperture and magnifications exceeding 100x under steady atmospheric conditions.
- Q2: Why do my planetary photos look like blurry blobs?
- This is usually caused by “seeing” (atmospheric turbulence) or poor focus. Ensure your telescope is collimated (optics aligned) and use the “Lucky Imaging” technique—taking video instead of single photos—to bypass the blur of the atmosphere.
- Q3: What is the best camera for planetary astrophotography?
- Dedicated “Planetary Cameras” (high-speed CMOS sensors) from brands like ZWO or QHY are best. They offer high frame rates (FPS) and small pixels, which are ideal for the high magnification required for planets.
- Q4: Do I need a tracking mount to photograph comets?
- For bright comets, you can take short exposures on a tripod, but for the spectacular tail detail seen in professional photos, a motorized equatorial mount is essential to follow the comet’s movement across the sky.
- Q5: How do I get “Hubble colors” in my nebula photos?
- You need to use narrowband filters (SII, Hα, and OIII) and map them to the RGB channels in your editing software. Specifically, the “Hubble Palette” maps Sulfur to Red, Hydrogen to Green, and Oxygen to Blue.