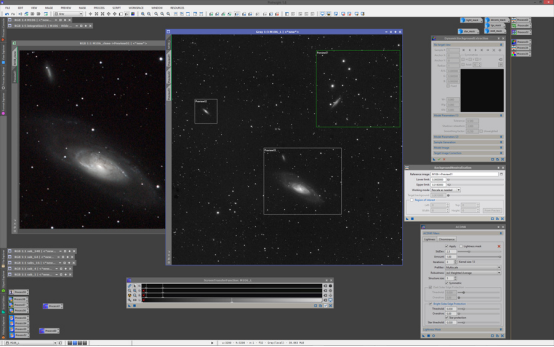
Astrophotography is a captivating pursuit that merges the artistry of photography with the scientific wonder of the cosmos. It allows enthusiasts to transcend the limitations of the naked eye, revealing the intricate beauty of distant nebulae, the majestic sweep of the Milky Way, and the subtle glow of faraway galaxies. This guide serves as an exhaustive pillar of knowledge, designed to equip aspiring and experienced astrophotographers alike with the techniques, tools, and insights necessary to transform raw celestial data into breathtaking visual masterpieces. We will delve into specific software workflows, panoramic stitching methodologies, and the identification of prime photographic targets, ensuring a holistic understanding of this challenging yet immensely rewarding field.
Unveiling the Cosmos: An Introduction to Astrophotography
Astrophotography encompasses a diverse range of techniques aimed at capturing images of astronomical objects and celestial events. From wide-field shots of constellations and meteor showers to deep-sky portraits of nebulae and galaxies, each sub-discipline presents its own set of challenges and rewards. The fundamental goal, regardless of the target, is to gather sufficient light and process it effectively to reveal details often invisible to the human eye. This typically involves long exposures, specialized equipment, and sophisticated post-processing software.
The Allure of Deep-Sky Imaging
Deep-sky imaging, specifically targeting nebulae, star clusters, and galaxies, represents a pinnacle of astrophotography. These faint objects require significant light collection and careful processing to bring out their intricate structures, vibrant colors, and ethereal glows. The journey from capturing raw sensor data to producing a stunning image is a complex but deeply satisfying process that demands patience and a keen eye for detail.
- Light Pollution Mitigation: Understanding how to minimize the effects of urban light pollution through filters, dark-sky sites, and advanced processing techniques is crucial for deep-sky success.
- Tracking and Guiding: Precise equatorial mounts and auto-guiding systems are indispensable for compensating for Earth’s rotation during long exposures, ensuring stars remain pinpoints rather than trails.
- Calibration Frames: The use of darks, flats, and bias frames is essential for removing noise, dust motes, and vignetting from raw images, leading to cleaner data for processing.

Mastering PixInsight: Processing Deep-Sky Nebula Images
PixInsight stands as a powerful, modular platform for astronomical image processing, renowned for its scientific rigor and comprehensive toolset. Unlike more general-purpose image editors, PixInsight is purpose-built for astrophotography, offering algorithms specifically designed to handle the unique challenges of deep-sky data. Its steep learning curve is often cited, but the unparalleled control and quality it offers make it an invaluable asset for serious imagers.
Core Workflow: From Raw Data to Stretched Master
The journey in PixInsight begins with raw data (e.g., FITS files) and progresses through a series of meticulous steps to create a linear, calibrated, and stacked master image. This linear stage is where most of the critical data preparation occurs before any non-linear stretching is applied.
- Calibration: This initial phase involves applying dark, bias, and flat frames to the light frames to remove sensor noise, thermal current, and optical artifacts. Tools like BatchPreprocessingScript or manual application of ImageCalibration and ImageIntegration are used.
- Cosmetic Correction: Identifying and removing hot pixels and cosmic ray artifacts is crucial for a clean image. The CosmeticCorrection process helps to automatically detect and replace these anomalies.
- Debayering (Demosaicing): For one-shot color (OSC) cameras, this step converts the raw monochrome sensor data into a color image using interpolation. The BayerDrizzle or Debayer process performs this function.
- Star Alignment: If individual frames are slightly misaligned due to tracking errors or field rotation, StarAlignment precisely registers them so they can be accurately stacked.
- Image Integration (Stacking): This is the process of combining all calibrated and aligned light frames into a single master image, significantly improving the signal-to-noise ratio (SNR). ImageIntegration offers various algorithms for optimal stacking.
Advanced Processing: Enhancing Detail and Color
Once a linear master image is created, the focus shifts to bringing out the faint details and natural colors of the nebula. This non-linear stage requires careful application of various tools to avoid artifacts and maintain image integrity.
- Dynamic Background Extraction (DBE) / Automatic Background Extraction (ABE): These tools are vital for removing light pollution gradients and uneven background illumination, ensuring a clean, neutral background. DBE allows for manual placement of samples, offering more control.
- Photometric Color Calibration (PCC): This process uses astrometric solutions to accurately calibrate the color balance of the image based on known star colors, resulting in scientifically accurate hues.
- Deconvolution: A powerful technique to reverse the blurring effects of atmospheric seeing and optical aberrations, sharpening stars and nebular details. It’s a delicate process that can introduce artifacts if over-applied.
- Noise Reduction: Techniques like MultiScaleMedianTransform (MMT) or TGVDenoise are used to selectively reduce noise without sacrificing fine detail. Careful masking is often employed to protect structures.
- Histogram Transformation (Stretching): This is the critical step where the linear data is stretched into a non-linear state, making the faint nebular details visible. MaskedStretch and manual HistogramTransformation are commonly used, often with a StarMask to protect stars from bloating.
- Local Histogram Equalization (LHE) / HDRMultiscaleTransform: These processes enhance local contrast and dynamic range within the nebula, bringing out subtle textures and depth.
- Color Saturation: Tools like ColorSaturation and CurvesTransformation are used to boost the colors of the nebula, ensuring they are vibrant but natural.

Capturing the Milky Way Arch: A Panoramic Stitching Guide
The Milky Way arch, especially during winter months from specific hemispheres, presents a breathtaking celestial spectacle that often exceeds the field of view of a single camera shot. To capture its full grandeur, astrophotographers employ panoramic stitching techniques, combining multiple images into one expansive vista. This method not only allows for a wider field of view but also helps in gathering more light, improving the overall image quality and detail.
Planning Your Milky Way Panorama Shoot
Successful panoramic stitching begins long before you press the shutter. Meticulous planning is key to ensure proper overlap, consistent exposure, and a compelling composition.
- Location Scouting: Choose a dark-sky location with a clear horizon and minimal light pollution. Apps like PhotoPills or Stellarium can help predict the Milky Way’s position relative to your chosen foreground.
- Timing: The Milky Way core is typically best photographed during specific moon phases (new moon) and times of the night when it’s high in the sky. For the winter arch, research the optimal viewing window for your hemisphere.
- Equipment Selection:
- Camera: A full-frame or APS-C camera with good high ISO performance.
- Lens: A fast wide-angle lens (e.g., 14-24mm f/2.8) is ideal. While “wide-angle” is in the title, for panoramas, a slightly less wide lens (e.g., 35mm or 50mm) can be used to capture more detail per panel, though it will require more panels.
- Sturdy Tripod: Essential for stability during multiple long exposures.
- Panoramic Head (Optional but Recommended): A nodal rail or panoramic head helps rotate the camera around the nodal point of the lens, minimizing parallax errors during stitching.
- Intervalometer: For automated shooting of multiple frames.
- Composition: Visualize your final panorama. Incorporate interesting foreground elements (e.g., trees, mountains, abandoned structures) to add depth and scale to the cosmic scene.
Step-by-Step Acquisition for Panoramic Stitching
Once on location, a systematic approach to capturing your individual panels will ensure seamless stitching in post-processing.
- Manual Focus: Focus on a bright star or distant light source, then lock focus manually. Double-check focus using live view zoom.
- Exposure Settings: Use the 500 Rule (500 / focal length = max shutter speed without star trailing) as a starting point for shutter speed. Adjust ISO and aperture (wide open, e.g., f/2.8) to achieve proper exposure. Consistent exposure across all panels is critical.
- White Balance: Set a custom white balance (e.g., 3500-4000K) or use a preset like “Tungsten” to avoid color shifts between panels and allow for easier post-processing.
- Overlap: Ensure each consecutive shot overlaps the previous one by at least 30-50%. This provides sufficient data for stitching software to accurately align the images.
- Shooting Sequence: Begin at one end of your desired arch, take a shot, rotate your camera slightly (horizontally or vertically, depending on your panorama type), take another shot, and continue until you’ve covered the entire arch. For vertical arches, you might shoot multiple rows.
- Dark Frames (Optional): If shooting very long exposures, consider taking a few dark frames at the end of your session with the lens cap on, matching the exposure time and ISO, to help reduce noise.

Exploring Celestial Wonders: Top Objects for Astrophotography
The vast expanse of the night sky offers an endless array of subjects for astrophotographers. While the Milky Way itself is a prime target, countless individual celestial objects lie within and beyond our galaxy, each presenting unique photographic opportunities. Understanding the characteristics and optimal viewing times for these objects is crucial for successful imaging.
Nebulae: Cosmic Clouds of Gas and Dust
Nebulae are among the most visually stunning deep-sky objects, ranging from emission nebulae (glowing due to ionized gas) to dark nebulae (obscuring background light) and reflection nebulae (reflecting light from nearby stars). They are often vibrant and complex, making them excellent targets for detailed imaging.
- Orion Nebula (M42): Located in the constellation Orion, this is one of the brightest and most famous nebulae, visible even to the naked eye. It’s a stellar nursery, rich in detail and color, making it an ideal target for beginners and advanced imagers alike.
- Lagoon Nebula (M8): A giant interstellar cloud in Sagittarius, known for its distinct central region and bright star cluster. It’s best observed during summer months in the northern hemisphere.
- Eagle Nebula (M16): Also in Serpens, famous for its “Pillars of Creation” captured by the Hubble Space Telescope. It’s a star-forming region with dramatic dust columns.
- Rosette Nebula (NGC 2237): A large, circular emission nebula in Monoceros, resembling a rose. It requires a wide field of view and often benefits from narrowband filters to bring out its intricate structure.
Star Clusters: Stellar Groupings
Star clusters are gravitationally bound groups of stars, typically categorized into open clusters (younger, loosely bound) and globular clusters (older, densely packed). They offer a different kind of beauty, showcasing stellar evolution and cosmic dynamics.
- Pleiades (M45): Also known as the Seven Sisters, this open cluster in Taurus is easily visible and surrounded by beautiful blue reflection nebulosity, making it a popular wide-field target.
- Double Cluster (NGC 869 & NGC 884): Two magnificent open clusters in Perseus, visible with the naked eye under dark skies. They are rich in bright, blue-white stars and offer a striking visual contrast.
- Hercules Globular Cluster (M13): A spectacular globular cluster in Hercules, containing hundreds of thousands of stars. It’s a challenging but rewarding target for showing individual stars within its dense core.
Galaxies: Island Universes Beyond Our Own
Galaxies are vast systems of stars, gas, dust, and dark matter. Photographing them offers a glimpse into the cosmic scale beyond the Milky Way, revealing spiral arms, galactic cores, and often interacting structures.
- Andromeda Galaxy (M31): Our closest large spiral galaxy, visible even to the naked eye under dark conditions. It’s a massive target that requires a moderate focal length and patience to capture its subtle spiral arms and companion galaxies.
- Triangulum Galaxy (M33): Another nearby spiral galaxy, slightly more challenging than Andromeda but still a rewarding target for its well-defined spiral structure.
- Bode’s Galaxy (M81) & Cigar Galaxy (M82): A famous pair of interacting galaxies in Ursa Major, often captured in the same wide field of view. M82 is known for its dramatic starburst activity.
When selecting targets, consider their apparent size, brightness, and position in the sky relative to your location and equipment. Using astronomical planning software can greatly assist in this selection process.

Advanced Astrophotography Techniques and Best Practices
Beyond the fundamental acquisition and processing steps, several advanced techniques and best practices can significantly enhance the quality and impact of your astrophotography. These often involve specialized equipment, refined workflows, and a deeper understanding of light and optics.
Narrowband Imaging
Narrowband imaging is a powerful technique primarily used for emission nebulae, which glow predominantly in specific wavelengths of light emitted by hydrogen-alpha (Ha), oxygen-III (OIII), and sulfur-II (SII) atoms. By using filters that pass only these narrow bands of light, astrophotographers can capture stunning details even from light-polluted areas, and create vivid false-color compositions (e.g., the Hubble Palette).
- Benefits: Drastically reduces light pollution, enhances contrast of nebular structures, allows for unique color mapping.
- Considerations: Requires specialized monochrome cameras and narrowband filters, longer total integration times, and advanced processing techniques for combining channels.
Dithering
Dithering is a technique where the telescope’s pointing is shifted by a few pixels between each sub-exposure. This seemingly minor adjustment plays a crucial role in reducing fixed pattern noise (e.g., walking noise) and hot pixels, making them easier to remove during stacking and calibration. It disperses these artifacts randomly across the image, allowing stacking algorithms to distinguish them from genuine signal.
- Implementation: Typically controlled by guiding software (e.g., PHD2) in conjunction with an equatorial mount.
- Impact: Leads to cleaner final images with higher signal-to-noise ratio and fewer artifacts, especially beneficial for faint targets requiring many sub-exposures.
Flat Field Correction Mastery
While basic flat frames remove dust and vignetting, mastering flat field correction involves understanding how to capture perfect flats that accurately represent the optical train’s illumination profile. This includes ensuring consistent illumination (e.g., using an LED tracing panel), matching focus and rotation, and capturing enough frames for a robust master flat.
- Common Issues: Improperly exposed flats, dust motes that move, or focus changes can render flats ineffective or even introduce new artifacts.
- Best Practice: Capture flats immediately after your imaging session, before dismantling your setup, to ensure all optical elements (camera, filters, focuser) are in the exact same position.
Data Integration Strategies
Advanced data integration goes beyond simple stacking. It involves combining data from different imaging sessions, different filters (e.g., LRGB + Ha), or even different telescopes. Techniques like weighted batch preprocessing, image registration across multiple channels, and careful channel combination are critical for maximizing the information extracted from your collected data.
- Multi-Session Stacking: Combining data from multiple nights to increase total integration time and improve SNR.
- Luminance Blending: Using high-resolution luminance data (often from a clear filter) to enhance detail in a color image derived from RGB or narrowband channels.
- Mosaic Creation: For extremely large targets, creating a mosaic involves capturing multiple adjacent panels and stitching them together, similar to a panorama but often on a larger, deeper scale for deep-sky objects.

Conclusion: Your Journey Through the Cosmic Canvas
Astrophotography is a continuous journey of learning, experimentation, and discovery. From the initial thrill of capturing your first faint galaxy to mastering complex processing workflows in PixInsight and orchestrating grand Milky Way panoramas, each step deepens your connection to the universe. The techniques and best practices outlined in this guide provide a robust foundation for producing stunning celestial images, but the true essence of astrophotography lies in patience, perseverance, and the passion to unveil the hidden beauty of the cosmos. Keep exploring, keep learning, and most importantly, keep looking up.
Embracing the Astrophotography Community
Connecting with other astrophotographers, sharing experiences, and seeking feedback are invaluable aspects of growth in this hobby. Online forums, local astronomy clubs, and workshops offer opportunities to learn from peers, troubleshoot challenges, and stay abreast of new techniques and equipment. The collaborative spirit of the astrophotography community is a powerful resource for anyone dedicated to capturing the night sky.
Frequently Asked Questions (FAQ)
- Q1: What are the absolute essential pieces of equipment for a beginner in deep-sky astrophotography?
- For a beginner, the absolute essentials include a sturdy equatorial mount (often the most crucial investment), a camera (DSLR/mirrorless or dedicated astronomy camera), a telescope or a fast telephoto lens, and a means for accurate tracking (e.g., an auto-guider system). A laptop for control and image acquisition software is also necessary.
- Q2: How important is light pollution when processing deep-sky images, and how can PixInsight help?
- Light pollution is a significant challenge, as it adds unwanted gradients and noise to your images. PixInsight’s Dynamic Background Extraction (DBE) and Automatic Background Extraction (ABE) tools are exceptionally powerful for accurately modeling and removing these gradients without sacrificing nebular data. Additionally, narrowband imaging (processed in PixInsight) can largely mitigate light pollution effects.
- Q3: Can I stitch a Milky Way panorama with just a standard tripod, or do I need a panoramic head?
- While a standard tripod can work, a panoramic head (or nodal rail) is highly recommended. It allows you to rotate the camera around the “nodal point” of the lens, which minimizes parallax errors. Parallax errors cause foreground objects to shift relative to the background between shots, making seamless stitching difficult, especially with prominent foreground elements. For distant subjects like the Milky Way alone, a standard tripod might suffice if care is taken with overlap.
- Q4: What is the “500 Rule” in astrophotography, and how accurate is it?
- The 500 Rule is a guideline to determine the maximum shutter speed you can use before stars start to trail in your image due to Earth’s rotation. The formula is: 500 / (focal length of your lens) = maximum shutter speed in seconds. For crop sensor cameras, some suggest using 300 or adjusting the focal length by the crop factor. It’s a useful starting point, but individual results may vary based on pixel size, target declination, and desired star sharpness, so always check your images.
- Q5: Why are calibration frames (darks, flats, bias) so important, and what do they remove?
- Calibration frames are crucial for cleaning up your raw image data. Dark frames remove thermal noise and amp glow. Bias frames remove readout noise. Flat frames remove vignetting (darkening at the edges of the image) and dust motes on your sensor or optics. By subtracting/dividing these from your light frames, you significantly improve the signal-to-noise ratio and overall image quality, revealing more subtle details.