The Severe Dangers of Staring Directly at the Sun
The human eye is an incredibly delicate instrument, evolved to process ambient light scattered by the environment, not to withstand the direct, unmitigated fury of a star. Staring directly at the sun, even for a few seconds, exposes your ocular tissues to extreme levels of ultraviolet (UV), visible, and infrared (IR) radiation. This intense energy can cause irreversible damage to the macula, the central part of the retina responsible for sharp, detailed vision. Because the retina entirely lacks pain receptors, you will not feel the damage as it occurs. The absence of immediate discomfort creates a deceptive and highly dangerous situation where severe visual impairment can develop silently.
This condition, medically known as solar retinopathy, occurs when the highly concentrated solar energy literally cooks the retinal tissue. The lens of your eye acts like a magnifying glass, focusing the sun’s rays into a tiny, intensely hot point on the back of your eye. The resulting photochemical toxicity and thermal injury can lead to permanent blind spots (scotomas), distorted vision (metamorphopsia), and altered color perception.
Understanding Solar Retinopathy
Solar retinopathy is not a myth; it is a well-documented clinical condition that spikes in frequency immediately following partial solar eclipses. When the ambient light drops during an eclipse, the eye’s pupil naturally dilates to let in more light. If an observer looks at the sun without proper protection during this phase, a massive amount of harmful radiation bypasses the dilated pupil and strikes the unprotected retina. Recovery from solar retinopathy is unpredictable; while some patients regain partial vision over several months, many are left with permanent central vision loss.
- Ultraviolet (UV) Radiation: Accelerates cellular aging in the eye and contributes to the formation of cataracts and photokeratitis (sunburn of the cornea).
- Infrared (IR) Radiation: Carries thermal energy that physically heats and destroys the delicate photoreceptor cells in the retina.
- Intense Visible Light: Overwhelms the retinal cells, causing a toxic cascade of chemical reactions that result in cell death.
It is imperative to understand that standard sunglasses, regardless of how dark they are or whether they boast “100% UV protection,” are completely inadequate for direct solar viewing. They do not block the intense visible light or the damaging infrared radiation required to keep your eyes safe.

Essential Solar Filters for Observing the Sun
To safely observe the sun directly, you must use purpose-built solar filters that block 99.999% of the sun’s visible light, as well as 100% of the harmful UV and IR radiation. The international safety standard for direct solar viewing is ISO 12312-2. Any product used to look at the sun—whether it is a pair of cardboard eclipse glasses or a high-end glass filter for a telescope—must strictly adhere to this certification.
Solar filters come in several different materials, each offering a unique viewing experience and specific advantages. Choosing the right filter depends on your equipment and what specific solar features you wish to observe. Below, we explore the primary types of safe solar filters available to amateur astronomers and casual observers alike.
Types of Approved Solar Filters
When purchasing solar filters, always buy from reputable vendors vetted by astronomical societies. Counterfeit eclipse glasses flood the market during major celestial events, posing a massive public health risk. Legitimate filters utilize advanced materials to safely attenuate the sun’s energy.
| Filter Material | Visual Color of the Sun | Best Use Case | Durability & Cost |
|---|---|---|---|
| Aluminized Mylar / AstroSolar Film | Cool Blue or Neutral White | Telescopes, binoculars, and camera lenses. Excellent for high-resolution sunspot viewing. | Highly fragile, prone to pinholes if mishandled. Very cost-effective. |
| Black Polymer | Warm Orange or Yellow | Standard cardboard eclipse glasses and handheld solar viewers. | More durable than Mylar. Inexpensive and perfect for casual visual observation. |
| Optical Glass Filters | Yellow-Orange | High-end telescopes and professional astrophotography. | Extremely durable, scratch-resistant, but significantly more expensive. |
Regardless of the material chosen, the filter must always be placed on the front of your optical device (the objective lens), never at the eyepiece. An eyepiece filter will rapidly heat up from the concentrated solar energy gathered by the primary lens or mirror, causing the filter to shatter instantly and directing a blinding beam of concentrated sunlight directly into your eye.

How to Safely Observe the Sun During a Solar Eclipse
A solar eclipse is one of nature’s most spectacular phenomena, occurring when the moon passes exactly between the Earth and the Sun, casting its shadow upon our planet. However, the changing phases of an eclipse require strict adherence to safety protocols. A solar eclipse consists of partial phases and, if you are within the path of totality, a brief period of a total eclipse.
The rules for viewing an eclipse are absolute: you must wear ISO 12312-2 certified eclipse glasses during all partial phases of the eclipse. Even if the sun is 99% obscured by the moon, the remaining 1% crescent is still intensely bright enough to cause instantaneous and permanent retinal damage.
Navigating the Phases of an Eclipse
Understanding the timeline of an eclipse is crucial for knowing when you must use protection and when it is safe to view the event with the naked eye. The transition between phases happens rapidly, so preparation and situational awareness are key.
- First Contact (Partial Eclipse Begins): The moon takes its first “bite” out of the sun. Protection is mandatory. You must use eclipse glasses or solar filters continuously.
- Baily’s Beads & The Diamond Ring: Just moments before totality, sunlight peeks through the rugged lunar valleys, creating brilliant points of light. Protection is still mandatory.
- Totality (The Sun is Completely Covered): The moon fully obscures the solar disk, revealing the sun’s ethereal white corona. This is the ONLY time you can safely remove your eclipse glasses. You can view totality with the naked eye or binoculars.
- Third Contact (Totality Ends): The first sliver of the sun’s bright surface reappears. You must immediately put your eclipse glasses back on.
If you are observing an annular eclipse (where the moon is too far from Earth to completely cover the sun, leaving a “ring of fire”), there is no period of totality. Therefore, you must wear solar viewing glasses for the entire duration of the event.

The Pinhole Projection Method: Seeing Sunspots on Paper
If you do not have access to certified solar filters or eclipse glasses, you can still observe the sun safely using indirect methods. The most reliable and accessible indirect method is pinhole projection. This technique does not involve looking at the sun at all; instead, you look at a projected image of the sun on a secondary surface. This method is incredibly safe, educational, and perfect for children and classroom settings.
Pinhole projection works on the basic optical principle of a camera obscura. When light from the sun passes through a small aperture (the pinhole), the light rays cross and project an inverted image of the light source onto a screen placed behind the hole. The longer the distance between the pinhole and the projection screen, the larger (though dimmer) the resulting image of the sun will be.
Building and Using a DIY Pinhole Projector
Creating a pinhole projector requires only basic household materials: two pieces of stiff white cardboard, a square of aluminum foil, tape, and a pin or needle. By following a few simple steps, you can create an effective tool for tracking partial eclipses or even spotting large sunspot clusters.
- Step 1: Prepare the Aperture. Cut a small square hole (about 1 inch by 1 inch) in the center of one piece of cardboard. Tape a piece of aluminum foil over this hole.
- Step 2: Create the Pinhole. Carefully use a needle or thumbtack to poke a single, clean, round hole in the center of the aluminum foil. A perfectly round hole yields the sharpest image.
- Step 3: Positioning. Stand with your back to the sun. Hold the cardboard with the pinhole up so that sunlight strikes it.
- Step 4: Projection. Hold the second piece of white cardboard (the screen) in the shadow cast by the first piece. Adjust the distance between the two pieces until you see a crisp, circular image of the sun.
During a partial eclipse, this projected circle will clearly show the crescent shape of the eclipsed sun. On a normal, clear day, if you make the projection distance long enough (several feet), you may be able to identify large, dark blemishes on the projected solar disk—these are sunspots, cooler regions of intense magnetic activity on the sun’s photosphere.

Advanced Safe Ways to Observe the Sun Using Telescopes
For amateur astronomers seeking high-resolution views of the sun’s surface, telescopes offer unparalleled detail. However, magnifying the sun without proper safety equipment is exceptionally dangerous. Telescopes gather vastly more light than the human eye, and viewing the sun through an unfiltered telescope will cause instantaneous, catastrophic eye damage and can easily start fires.
There are two primary ways to safely observe the sun through a telescope: using a full-aperture front-mounted solar filter (White Light observation) or utilizing a dedicated solar telescope designed specifically for narrow-band observation (such as Hydrogen-Alpha).
White Light vs. Hydrogen-Alpha (H-Alpha) Observation
Understanding the difference between broadband and narrowband solar observation is critical for setting expectations and choosing the right equipment for your astronomical goals.
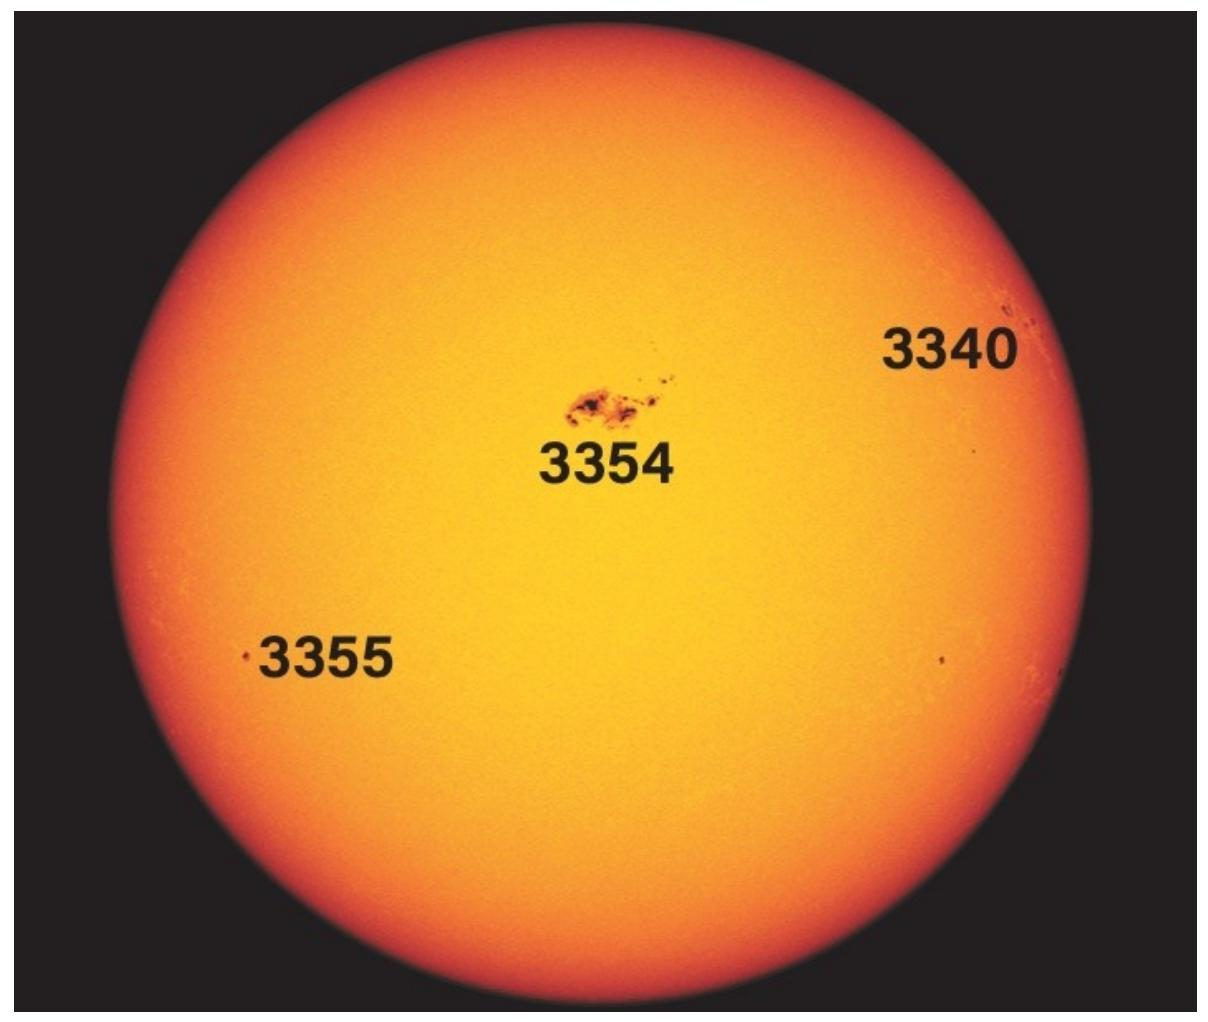
White Light Observation: This method requires a specialized solar film or glass filter securely fastened over the front objective lens of your existing telescope. This setup allows you to view the sun’s photosphere. Through a white light filter, the sun appears as a stark white, yellow, or orange disk. You will be able to clearly see sunspots, the darker umbra and lighter penumbra of those spots, and sometimes faculae (bright, hot regions near the solar limb). It is crucial to ensure the filter is securely taped or fastened so a gust of wind cannot blow it off during observation.
Hydrogen-Alpha (H-Alpha) Observation: To see the sun’s dynamic atmosphere—the chromosphere—you need a dedicated solar telescope or a highly specialized rear-mounted filter system paired with an energy rejection filter (ERF) on the front. H-Alpha filters isolate a specific wavelength of red light (656.28 nanometers) emitted by excited hydrogen atoms. This reveals a drastically different, highly active sun. Through an H-Alpha telescope, you can witness towering solar prominences leaping from the sun’s edge, snake-like dark filaments stretching across the disk, and the granular, mottled texture of the chromosphere. Because these telescopes reject all other wavelengths of light, they are inherently safe, though they represent a significant financial investment.

Debunking Deadly Solar Observation Myths
Despite widespread public education campaigns during major solar events, dangerous myths about DIY solar filters persist. Using unapproved household items to view the sun is a gamble with your eyesight. Many materials that appear dark enough to comfortably dim the sun’s visible light are completely transparent to infrared radiation. This means that while your eyes feel comfortable, your retinas are silently being burned by invisible heat rays.
It is vital to actively dispel these myths to protect yourself, your family, and your community during solar observation events.
Materials You Must NEVER Use
The following items are strictly prohibited for direct solar viewing. They do not meet the ISO 12312-2 safety standards and will put you at immediate risk of solar retinopathy.
- Standard Sunglasses: Even the darkest polarized sunglasses or multiple pairs stacked together transmit thousands of times too much sunlight.
- Smoked Glass: A historical method that is highly unsafe. The soot layer is uneven and easily scratched, allowing dangerous rays to penetrate.
- Exposed Photographic Film or X-Rays: While some specific types of black-and-white silver-emulsion film were historically used, modern color film and medical X-rays do not contain the silver necessary to block infrared light.
- CDs and DVDs: Looking through the metallic layer of an optical disc is dangerous. The aluminum coating is too thin and inconsistent to provide adequate protection.
- Welding Glass below Shade 14: Only specialized Shade 14 welding glass is dark enough for safe solar viewing. Most standard welding helmets use much lighter shades (like Shade 10 or 12), which will cause eye damage if used to look at the sun.
Always prioritize your vision over convenience. If you do not have an ISO-certified filter or a proper pinhole projection setup, simply tune into a live stream of the solar event provided by organizations like NASA or major astronomical observatories.
Frequently Asked Questions (FAQ)
- Can I use my smartphone camera to take a picture of the sun?
- Pointing your smartphone directly at the sun without a solar filter can permanently damage the camera’s sensor. The lens focuses intense heat and light onto the delicate electronics. To safely photograph the sun, you must tape a piece of ISO-certified solar filter material completely over the smartphone’s camera lens before pointing it skyward.
- Do solar eclipse glasses expire?
- If your eclipse glasses comply with the ISO 12312-2 standard and are in pristine condition—meaning there are no scratches, punctures, tears, or detachment from the frame—they do not expire and can be reused indefinitely. Always inspect them by holding them up to a bright indoor light before using them on the sun. If you see any light leaking through a scratch, discard them immediately.
- Is it safe to look at the sun when it is setting or rising?
- While the sun appears dimmer and redder at sunrise or sunset due to atmospheric scattering (Rayleigh scattering), it is still not entirely safe to stare at it. The atmosphere filters out some visible and UV light, but enough harmful radiation can still reach your eyes to cause damage, especially if viewed through optical aids like binoculars. Always err on the side of caution.
- How can I safely project the sun using binoculars?
- You can use binoculars to project the sun’s image onto a white piece of paper, similar to a pinhole projector but much brighter and larger. Securely mount the binoculars on a tripod. Keep the lens caps on one side. Point the binoculars at the sun without looking through them (use the shadow of the binoculars to align them). Hold a white paper behind the eyepiece to catch the projected image. Never leave this setup unattended, as the intense heat can melt the internal plastic components of the binoculars within minutes.
- What should I do if I suspect I have solar retinopathy?
- If you experience blurry vision, a blind spot in your central vision, distorted lines, or changes in color perception after looking at the sun, you must schedule an immediate appointment with an ophthalmologist or an optometrist. There is no specific medical treatment or surgery for solar retinopathy, but a professional eye exam is necessary to diagnose the extent of the damage and monitor for any potential spontaneous recovery.